Grain-Free Lemon Bars
Grain-Free, Gluten-Free, Nut-Free
When life gives you lemons... make these perfect grain-free lemon bars! The taste is a remarkable contrast of sour lemon sweetened with just enough sugar, giving you an amazing citrusy tang without making your mouth pucker. They have a velvety smooth filling not quite like any other dessert. As if that wasn’t spectacular enough, you add a thick, buttery, vanilla shortbread crust (sometimes the best part) and you've got yourself a winning dessert. It’s a perfect combination of flavors and texture that’ll delight your taste buds. You better make two pans—maybe three.
Ready to get cooking? Here’s the recipe you’ve been looking for.

Ingredients
Shortbread Crust
- 1 stick (½ cup) unsalted butter (melted)
- ¼ cup granulated sugar
- 1 tsp vanilla extract
- ¼ tsp sea salt
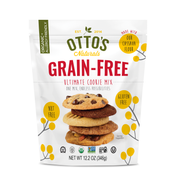
- ¾ cup Otto’s Naturals - Cassava Flour
Lemon Filling
- 1 cup granulated sugar
- 3 tbsp Otto’s Naturals - Cassava Flour
- 3 large eggs
- 1 tsp lemon zest
- ½ cup lemon juice
- Powdered sugar to dust top
Instructions
- Preheat the oven to 325°F. Line and grease an 8x8-inch baking pan.
- For the Crust: mix melted butter, sugar, and vanilla in a medium bowl. Add flour and mix until combined. The dough will be thick. Press firmly into the prepared baking pan. Bake for 20-22 minutes or until the edges are light brown. Once removed from the oven, poke holes over top of the warm crust using a fork. This helps the filling stick and holds the crust in place.
- For the Filling: sift the sugar and flour together in a large bowl. Add lemon juice, zest, and eggs and whisk until completely combined.
- Pour filling over the warm crust. Bake for 22-26 minutes or until the center is relatively set and no longer jiggles. Remove bars from the oven and allow to cool at room temperature.
- Once cooled, lift the parchment out of the pan. Dust with powdered sugar and cut in squares or triangles before serving. Note: if the bars are not completely cooled the powdered sugar will disappear!
- Cover and store bars in the refrigerator for up to one week.


How do you make the best lemon bars?
Use real lemons. No skimping on this. You just can’t get the same great flavor from a bottle. You will need fresh anyway for the lemon zest called in the recipe.
If you have one, use a glass pan. It works better than a metal pan, plus you won’t have to worry about a metallic taste transferring to your yummy bars.
Lining a pan with parchment paper is always a good idea though if that's what you're using - it makes for easy cleanup and also easier to get the bars out of the pan!
How to pick a perfect lemon:
Now that you have found the perfect flour, you will be wanting to find the perfectly ripe lemon. For the best lemons look for a smooth or glossy texture. If it’s too bumpy it will be under-ripe or not juicy. Another sign of ripening is a waxy sheen. Since all citrus fruit, including lemons, ripen on the tree, be sure to pick one that is that bright cheery shade of yellow. It won’t ripen after you bring it home.
To squeeze or not to squeeze? While squeezing fruit while you shop is generally frowned upon, when it comes to citrus, it’s a must. The juiciest lemons are not the hard ones but the ones that give a little when squeezing them. A lemon that is too hard will be either under-ripe or shriveled inside.
Softer lemons will have not only more juice but also will be easier to juice. So pick a lemon and gently press it with your thumb, if it gives a little this is the one you want to take home.
How to get more juice from a lemon:
How do you get the most juice for the least amount of work?
Place the whole lemon onto a paper towel or plate. Microwave for 10 second if the lemon is at room temperature (or 20 seconds if it was in the refrigerator).
Before cutting, lay the lemon down on its side on your countertop or cutting board. With the palm of your hand press down and roll with moderate pressure back and forth for 25-30 seconds. This will soften the inside membrane of the lemon and you’ll get more lemon juice.
Cut lemon in half and juice the lemon using a juicer.
What’s the best way to cut lemon bars?
First and most important, let them cool completely, and then place them in the fridge. We know they are tempting to eat right away, but try waiting. They need at least an hour in the fridge. If you have the willpower, overnight is best.
Take them out of the fridge and cut them right away. Use a knife that has been run under hot water. Make one cut, dry the knife, run under hot water, and repeat. Do this each time and your lemon bars will have that perfect professional bakery look.