Grain-Free Melting Snowman Cookies
Gluten-Free, Grain-Free, Nut-Free
These melting snowman cookies are a great, easy-to-make snack and craft. Using Otto’s Naturals - Cassava Flour makes it easier on the stomach too! The fact that it’s gluten-free, grain-free, and nut-free is the icing on top of the cake (or cookie in this instance!) It’s absolutely the cutest delight during winter!

Ingredients
Cookies:
- 1 cup (2 sticks) salted butter, room temperature
- 1 cup granulated sugar
- 2 eggs
- 1 teaspoon vanilla extract
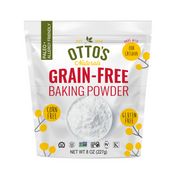
- ½ teaspoon Otto's Naturals Grain-Free Baking Powder
- 2 cups Otto's Naturals - Cassava Flour + additional for dusting (340g)
Icing:
- 2 cups powdered sugar
- 2 ½ Tablespoons milk
Assembly:
- Orange sprinkles
- Marshmallows (vegan or regular)
- ¼ cup chocolate chips
- Unreal chocolate drops (or other colored candy)
Instructions
- Cookies: In a medium bowl, mix the butter on high speed with a hand mixer until fluffy and light, about one minute.
- Add sugar and mix until combined, scraping sides of the bowl as needed.
- Beat in eggs, vanilla, and baking powder until combined.
- Add cassava flour, one cup at a time, and mix until a sticky dough forms.
- Transfer dough onto a piece of plastic wrap, form into a ball, and refrigerate for about one hour.
- Once the dough is chilled, line a cookie sheet with parchment paper and preheat the oven to 325°F.
- Divide dough in half. Sprinkle about a teaspoon of cassava flour on a piece of parchment paper, then flatten the first ball of dough on parchment. Sprinkle additional cassava flour on top of the dough, then place another piece of parchment on top. Using a rolling pin, roll out dough to ¼-inch thickness.
- Use a 3-inch circle cookie cutter to cut rounds out of the dough. Using a spatula, carefully transfer the cookies to the lined baking sheets. If the dough is sticky, dip the cutter into a little cassava flour before cutting the rounds.
- Gather dough scraps into a ball and roll out once more, then repeat cutting rounds. Repeat with the second half of the dough.
- Bake for 15-18 minutes, until the edges are lightly golden brown.
- Remove from the oven and allow to cool completely before decorating.
- Pre-Assembly: Insert one orange sprinkle into each marshmallow for the snowman’s nose.
- Gently melt the chocolate chips on the stovetop or in the microwave. Transfer the chocolate into a small plastic bag and snip a small piece off of one of the corners of the bag.
- Gently pipe the chocolate onto the marshmallows where the eyes and mouth should be. Place the marshmallows on a cutting board or tray, and set them in the freezer for the chocolate to harden. Place the bag of chocolate in a warm location to use later.
- Icing: Combine the icing ingredients in a medium bowl. Stir until a thick and smooth icing forms. The icing should be spreadable but not pasty or too soft. Add additional milk or powdered sugar to achieve the correct consistency.
- Assembly: Remove the marshmallows from the freezer. Spread the icing onto each cookie. It doesn’t have to be perfect or out to the edges. The icing will spread a little, and you want it to look like a snowman melting.
- Place a marshmallow onto each cookie near the edge of the icing. Add 2-3 chocolate drops for the snowman’s buttons on each cookie.
- Using the bag of chocolate, pipe two arms onto each cookie.
- Let the icing set and the chocolate harden for 12-24 hours before enjoying!

 How long will these last?
These snowman cookies will last in an airtight container for up to 3 days, but they are always best served on the day you make them.
We absolutely love seeing what you’ve created. So, if you do make this recipe, please send us a photo, comment on the box below, and let us know your story! Enjoy!


